Home Blog Page 2

How to make Raspberry Pi 3 Bluetooth work on Arch Linux or Rune Audio

Problem / Outcome Summary

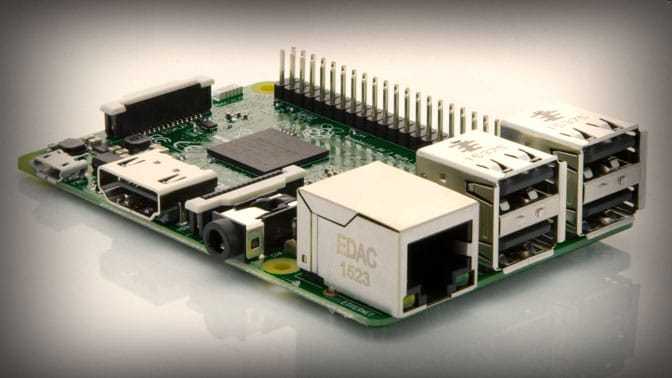
  • This how to guide will show you how to install a working Bluetooth driver for Arch Linux on the Raspberry Pi 3
  • Please see the ‘Summary Overview’ tab below for a high level view of the objectives this ‘how to’ will achieve.

This guide applies to:

  • Arch Linux on Raspberry Pi 3

Why might I want to do this?

  • Because currently Arch Linux does not supply a working bluetooth driver for Raspberry Pi 3
  • Because you want to add Bluetooth Capability to Rune Audio, which uses Arch Linux
  • Just because

Foreword

To be clear, why do I need to do this?

Sometimes distrubutions such as Arch Linux are not able to provide drivers as quickly as the public would like, new hardware comes out all the time and sometimes there are difficulties getting things to work.  It is important to make things work in an official way, which is why this uide uses AUR, the official Arch Linux User Repository.  In this way this should work until such time as Arch makes this official.

Full credit must go to Huulivoide from the Arch Linux User Repositories for creating these modified packages.

Pre-Requisites

Software Dependencies

  • Arch Linux or a derivative

Hardware Dependencies

  • Raspberry Pi 3

Tools Required

  • SSH if you have a headless based Arch Linux system such as Rune or other Arch Linux system

Other Dependencies

  • A working Internet connection

High Level Summary Steps

The below lists the high level summary of steps we’re about to take to get the Raspberry Pi 3 Bluetooth driver working in Arch Linux

  • Install software pre-requisites
  • Install Updated drivers
  • enable updated drivers
  • Test

Implementation

Install software pre-requisites

ssh into your Raspberry Pi 3 or start up a local console

Note that Rune Audio doesn’t really have an ordinary user account which therefore must be created, if you’re doing this on a rune Audio device, please see the next steps specific to Rune Audio.  If you don’t have a rune, just skip these.

Create an ordinary User Account for Rune Audio

# useradd -G wheel -m rune
# nano /etc/sudoers (uncomment the below line by taking the hash out)
# %wheel ALL=(ALL) NOPASSWD: ALL
# passwd rune (then enter your preferred password)
# su rune
$ cd /home/rune, then perform the below steps as this new ordinary user

$ sudo pacman -Syu (Note that this mostly will break Rune Audio, on Rune just omit the u to prevent a full system upgrade)

Install the build essentials

$ sudo pacman -S kernel26-headers file base-devel abs (Press Enter to accept default=all)
Press Y to proceed with installation.  If you get any errors about missing files, sometimes the pacman -Sy command fails, just repeat it and retry.

Arch will now retrieve any necessary package updates and install them.

Get the modified Raspberry Pi files that enable bluetooth

$ wget https://aur.archlinux.org/cgit/aur.git/snapshot/hciattach-rpi3.tar.gz
$ wget https://aur.archlinux.org/cgit/aur.git/snapshot/pi-bluetooth.tar.gz

( note watch your permissions here, for me I ended up downloading as root and doing a chown rune.rune on them to get it to work – Arch seems a bit ‘funky’ at times…

Also – check you have spare disk space ($df -h) if not, follow this disk space article here. You may also need to install the libutil-linux package if you get an fdisk error aka # pacman -Sy libutil-linux

Install updated drivers

$ tar -zxvf hciattach*
$ tar -zxvf pi-blue*
$ cd hciattach-rpi3
$makepkg -cs
Press Y to compile the package
$ sudo pacman -U hciattach-rpi3-5.38.1-armv7h.pkg.tar.xz (or your equivalent version which may change)
Press Y to install this newly compiled package

$ cd ..
$cd pi-bluetooth
$makepkg -cs
Press Y to compile the package
$ sudo pacman -U pi-bluetooth-1-1-armv7h.pkg.tar.xz
Press Y to install the package you just compiled
[spacer color=”429d4a” icon=”fa-angle-double-down” style=”3″]

Enable updated drivers

$ sudo systemctl enable brcm43438.service
$ sudo reboot

Essentially, this guide is now complete, after the reboot we will confirm that.

Test

$ hcitool dev

This command should output something like:

[rune@runeaudio pi-bluetooth]$ hcitool dev

Devices:

hci0 xx:xx:xx:xx:xx:xx

Final Word

You should now have a completely installed, automatically starting, bluetooth module.  The world is your oyster!  Enjoy.

If you have any issues or questions, hit me up in the comment section below.

Marshalleq

How to Monitor Plex with PlexPy on Ubuntu

Problem / Outcome Summary

  • This how to guide will show you how to install PlexPy on Ubuntu Linux so you can monitor Plex usage in your household

This guide applies to:

  • Ubuntu Linux

Why might I want to do this?

  • Because you want to monitor who is watching your Plex Library and when
  • Because you want to understand what types of devices are being used
  • Because you want to track down which players are causing transcoding to occur
  • Because you want to know what is most popular in your library
  • Because you want to know what media is synced to where and to whom
  • And many other features

Foreword

PlexPy is a monitoring system written in python and designed specifically for Plex.  It is an add-on which is unsupported by Plex, however the developer is now a Plex developer, so it is assumed at some point some of these features will make it into the main Plex application.  PlexPy comes with a host of monitoring features, which include:

  • Works on desktop, tablet and mobile web browsers
  • Themed to complement Plex/Web
  • Easy setup
  • Monitoring of current Plex Media Server activity
  • Fully customisable notifications for stream activity and recently added media
  • Top statistics on home page with configurable duration and measurement metric
  • Global watching history with search/filtering & dynamic column sorting
  • Full user list with general information and comparison stats
  • Individual user information including devices IP addresses
  • Complete library statistics and media file information
  • Rich analytics presented using Highcharts graphing
  • Beautiful content information pages
  • Full sync list data on all users syncing items from your library

The product home page is at: https://github.com/drzoidberg33/plexpy and for a list of screenshots, simply google plexpy in the image search e.g. here.  You will see it is quite extensive.[/vc_column_text]

Html code here! Replace this with any non empty text and that's it.

Pre-Requisites

Software Dependencies

Hardware Dependencies

  • None

Tools Required

  • SSH if you have a headless based Linux system such as a NAS or other Linux system

Other Dependencies

  • A working Internet connection

High Level Summary Steps

The below lists the high level summary of steps we’re about to take during this howto.

  • Install software pre-requisites
  • Install PlexPy
  • Configure PlexPy
  • Set PlexPy to automatically start at boot

Implementation

Install software pre-requisites

ssh into your Ubuntu Server or start up a local console

$ sudo apt-get install git-core

Install PlexPy

$ cd /opt
$ sudo git clone https://github.com/drzoidberg33/plexpy.git
$ cd plexpy
$ sudo python PlexPy.py

At this point, it appears as though you’re at a text installation screen and a username / password is required. Actually, that comes next. First just press ‘:’ and ‘q’ to get out and a temporary web server will be set up for you.

Configure PlexPy

Open your favourite web browser and enter in the IP Address of the server you installed PlexPy on with the 8181 as the port. e.g. 192.168.1.10:8181

You will get a PlexPy configuration screen
Click
Enter your normal Plex account username & password
Choose your Plex server from the drop down list or enter in it’s IP address
Tick on ‘Use SSL’
Leave the next few options enabled as default
Leave the notification disabled by default

You’ll receive a message that PlexPy is waiting 5 seconds to ensure authentication token is registered. This too more than 5 seconds for me. After this, you should then have the full PlexPy running in your web browser.

Set PlexPy to automatically start at boot

$ sudo adduser –system –no-create-home plexpy
$ sudo chown plexpy:nogroup -R /opt/plexpy
$ sudo ln -s /opt/plexpy/init-scripts/init.ubuntu /etc/init.d/plexpy
$ sudo update-rc.d plexpy defaults

Then start your plexpy service

$ sudo service plexpy start

Final Word

You should now have a completely installed, automatically starting, PlexPy monitoring service.  All you need to do is sit back and wait for the stats to start coming in!

If you have any issues or questions, please ask in the comments below.

Marshalleq

How to Control your Media Player with your TV Remote with HDMI-CEC

Problem / Outcome Summary

  • This how to guide discusses how to get your TV remote working with your Media Player using HDMI-CEC

This guide applies to:

  • Any Media Player or Media Device that uses HDMI-CEC such as Plex, XBMC, Kodi, Chromecast

Why might I want to do this?

  • Because it is the simplest and most effective way to control your media player
  • Because it’s easier than setting up a separate Infrared receiver on your Media Player and works just as well
  • Because the remote control applications found on Phones and tablets are generally harder and more clunky to use, even when designed for your specific media player

To be clear, what is HDMI-CEC?

HDMI-CEC is a standard designed for controlling devices over the HDMI interface, in full this acronym is High Definition Multimedia Interface – Consumer Electronics Control. With this standard, you can control media players plugged in using HDMI, from the standard TV remote which receives it’s keypresses via the TV’s built in Infrared receiver and sends them down the HDMI cable to the connected media player.  In addition it is possible to switch the TV on and select the appropriate input source from the media player, with noteable examples being Chromecast and Plex that do this.  Of course, standard DVD players connected with HDMI typically do this as well.

The standard is one that is common across all brands today, as it has been mandatory to support the CEC wiring standard since the inception of HDMI 1.0 in about 2005.  It has however been optional to implement the features, so if you have an ealier model Television it may not fully support HDMI-CEC, however typically common big brands such as Panasonic, Sony and Samsung should have at least basic support included.

How do I know if my Television Supports HDMI-CEC?

Many Television sets support HDMI-CEC, however even though this is a mandated standard, most brands call it their own name for marketing reasons.  In addition sometimes it is disabled in the Television for some reason, so be sure to go into your televisions menu and check that it is enabled.

Below is a list of known Manufacturer marketing names for HDMI-CEC, that may show up in your Television Menu.

  • Anynet+ – (Samsung)
  • Aquos Link – (Sharp)
  • BRAVIA Link / Bravia Sync – (Sony)
  • HDMI-CEC – (Hitachi)
  • E-Link – (AOC)
  • Kuro Link – (Pioneer)
  • INlink  – (Insignia)
  • CE-Link / Regza Link – (Toshiba)
  • RIHD (Remote Interactive over HDMI) – (Onkyo)
  • RuncoLink – (Runco International)
  • SimpLink – (LG)
  • T-Link -(ITT)
  • HDAVI COntrol / EZ-Sync / VIERA Link – (Panasonic)
  • EasyLink – (Philips)
  • NetCommand for HDMI – (Mitsubishi)

How do I make it work?

Actually, the beauty of HDMI-CEC is how easy it is to make it work.  If your TV has one of the above  marketing names and it’s switched on, it’s probably already working and you may not have ever realised it.  If you have just enabled it on your TV in the menu, it’s worth while shutting down your media player and restarting it if it’s not instantly working.

Try controlling your media player with your standard TV remote, you might be surprised.

However, if your TV has one of the above marketing names for HDMI-CEC and it’s still not working, double check if your media player supports HDMI-CEC as well.

Final Word

I recall the first time I saw this working with the amazing XBMC (now renamed to Kodi).  It really does work and is a godsend for people building custom media players simply because it’s another level of complexity that you don’t have to address.  In my view there is still nothing better than a traditional infrared remote.  I really dislike having to unlock my phone and especially giving it to other guests just so they can control my system.  A standard remote is there on the coffee table for anyone to use, it’s logical and natural and doesn’t require training.

If you have any issues or questions about HDMI-CEC, hit me up in the comment section below, or in the forums.

Marshalleq

How to set Plex permissions on linux or NAS devices

Problem / Outcome Summary

  • This how to guide will show you how to properly set up Linux file permissions for Plex Media Server
  • Please see the ‘Summary Overview’ tab below for a high level view of the objectives this ‘how to’ will achieve.

This guide applies to:

  • Any Linux distribution that stores files, which are connected to by Plex.  This may include:
    • Ubuntu, Sabayon, Redhat, SuSe Linux, Mint
    • QNAP NAS, Synology NAS, ReadyNAS

Why might I want to do this?

  • Because you get errors or missing items when scanning or updating your Plex Library
  • Because your files end up with different permissions than you intended
  • Because you’re security conscious and do not want your personal media to be deleted, read or copied by any unauthorised person
  • Because you have a NAS and have no idea how the permissions work on Linux
  • Because you are used to Windows and other ‘linux, unix or general *nix’ permissions are confusing

Foreword

To be clear, what are permissions and why do I care about them? 

You may not realise it, but all modern operating systems (such as Windows, Mac OS X and Linux) plus operating systems that run on NAS devices and even smartphones such as Android, Apple iPhone / iPad and Windows all have a permissions structure in order to protect data from unwanted access, errors and problems.  These problems can be as simple as accidental user file deletion of critical system files, a hacking attempt or indeed protecting your media from the fat fingers of family members causing you to have to work hard to restore from backups.  Plex is no different in that it accesses your data and therefore needs specific permissions from the operating system to do so.

A common problem I see around various forums on the internet is that many Plex customers don’t know how to set up their Linux based file permissions.  Often this comes about only because they notice their Plex media server Library can’t ‘see’ media on their storage.  Most commonly this happens with NAS devices, but can also come about when someone has custom built a Linux storage system such as FreeNAS or even on on of the many Linux Operating systems. Max OSX also uses very very similar file system attributes due to it’s roots coming from BSD.

What are the core items I need to know about?

*Nix based operating systems have a few core elements that work together with permissions that come into play in different scenarios.  For example, the mask command below set’s the default permissions for new files being copied into a share whereas the chmod command set’s the permissions for files that already exist in a share.  This is a common attribute often overlooked by those of us that came predominantly from the Windows camp.

Masks (the umask command)

On Unix ‘like’ operating systems (which include NAS devices), new files or directories are created with a default set of permissions.  A mask is a way of setting the permissions that would be applied by default (automatically) when new files are created in the applied locations.

Owner (the chown command)

The owner of the file describes to whom the relevant ‘mode’ (below) will apply.  The chown command set’s three ownership attributes which are Owner, Group and Everyone.

Mode (the chmod command)

The mode of a file or directory describes the type of access the system will allow the applicable owner (above) to have, for example read only.

How these attributes work together

Over on the implementation page, I’ll show you how to set and forget this, so that it works for Plex.  Before we do though, there’s one more point to note.  Some of these NAS appliances do have graphical tools that aim to do this in a simpler way.  You may be able to use those tools, but typically they do not have all the features and flexibility of the command line.  Also, sometimes the GUI on these NAS devices will not update to reflect the changes made through the command line.  This is not neccessarily something to worry about, but it is something to bare in mind.  The command line changes will still work and it is those I will predominantly focus on here.

How Plex requires permissions to be set

For official Plex servers, the server is set to run with the user ‘plex’ and the group ‘plex’.  This would include Ubuntu, Fedora, CentOS, FreeBSD and Mac OS X.  If you’re running a NAS your user may be different, but generally (such as with QNAP) these will still be assigned the user ‘plex’.  The one example I have heard of where it’s different is unraid.

Obviously in addition to this, you will require this ‘plex’ user account to have read/write/execute access to all of the files in your media locations as well.  Where this get’s complicated is when you realise that not only does plex have to write to these places, but also your windows / mac or linux computer that typically puts them there.  Furthermore, if you are not running Plex on your NAS directly there is yet another set of considerations.  Fear not, this guide explains them all.

Pre-Requisites

Software Dependencies

  • Any Linux / *nix based operating system which your files would be stored on
  • A linux based file system such as EXT4 or ReiserFS

Hardware Dependencies

Tools Required

  • SSH if you have a headless based Linux system such as a NAS

Other Dependencies

  • A working ethernet network

Summary Steps

The below lists the high level summary of steps we’re about to take during this howto.

  • Apply correct permissions to your media files / set up basic accounts
  • Apply correct ‘default’ permissions to your media
  • Apply correct permissions to your share
  • Additional steps if your plex server is running on a different computer to your media storage

Implementation

Apply correct permissions to your media files / set up basic accounts

**Note follow these steps for where your media storage is located, if your server is separate, that is covered under the additional steps at the end)

Log in or SSH into your NAS / Linux system

ssh username@192.168.1.10

enter your password

Navigate to your folder / directory where you have stored your media to begin

Obtain your currently set Plex permissions

ls -lah (you’ll get something similar to the below)

drwxrwxrwx    2 username everyone      4.0k Dec 22 18:47 Pictures/
-rw-rw-rw-    1 admin    administ      5.0k Dec 18  2012 s100img001.jpg
-rw-rw-rw-    1 admin    administ      4.5k Dec 18  2012 s100img002.jpg
-rw-rw-rw-    1 admin    administ      4.9k Dec 18  2012 s100img003.jpg
-rw-rw-rw-    1 admin    administ      3.9k Dec 18  2012 s100img004.jpg
-rw-rw-rw-    1 admin    administ      5.5k Dec 18  2012 s100img005.jpg
-rw-rw-rw-    1 admin    administ    115.5k Dec 18  2012 s800img001.jpg
-rw-rw-rw-    1 admin    administ     96.9k Dec 18  2012 s800img002.jpg
-rw-rw-rw-    1 admin    administ    138.5k Dec 18  2012 s800img003.jpg
-rw-rw-rw-    1 admin    administ    116.1k Dec 18  2012 s800img004.jpg
-rw-rw-rw-    1 admin    administ    133.4k Dec 18  2012 s800img005.jpg

Note that the directory owner permission is different from the file permission owner.

Create multimedia group

$ sudo addgroup –gid 2000 multimedia

Some NAS devices, notably QNAP do not have the concept of sudo, in that case just log in as root).

(I have specified a group id in this command which is optional, however if you are running your Plex media server on Ubuntu Linux this will make life a lot easier due to differences in numbering between NAS and linux platforms).

Apply correct ownership to your media files

$ sudo chown -R admin.multimedia Pictures

Here I have left the owner attribute as ‘admin’, but added the group ‘multimedia’.  This way, we can put specific user accounts such as plex and your main desktop user, into that group in order to provide access.  This command translates to, “Make the owner ‘admin’, the group owner ‘multimedia’ and apply that to the folder ‘Pictures’.

Apply correct modes to your media files

$ sudo chmod -R 775 Pictures

$ sudo find Pictures -type f -exec chmod 770 ‘{}’ +

So firstly that means for all folders and files, ‘give read, write and execute  permission (mode) to the owner ‘admin’ and the group ‘multimedia’, but give no access to everyone else’ and apply to the folder ‘Pictures’

Secondly, reset just the files (not the directories) to 770.  This is done because directories need the execute bit set so that you can list their contents, especially when connecting with afp or smb.  Note that if you mess anything up with new files or otherwise, these are the commands that will get you back to safety.

Modify your user accounts to be members of the multimedia group

$ sudo usermod -a -G multimedia plex (see below additional steps if you don’t have a plex account)

$ sudo usermod -a -G multimedia yourusername

Apply correct ‘default’ permissions to your media

A number of options come in here, depending on how you’re connecting.  Personally, I recommend using Samba (smb) for desktop to storage protocol as it has more options than afp for setting this type of thing.

Edit your smb.conf file (located in /etc/smb.conf) on your storage device

Find the share that applies to your data which will be contained within square brackets e.g. below:

[Pictures]
comment =
path = /share/CACHEDEV1_DATA/Pictures
browsable = yes
oplocks = yes
ftp write only = no
recycle bin = yes
recycle bin administrators only = no
public = yes
invalid users = “guest”
read list =
write list = “root”,”admin”,”username”,@”Multimedia”
valid users = “root”,”admin”,”username”,@”Multimedia”
inherit permissions = no
smb encrypt = disabled
mangled names = yes
hosts allow =
force user = “admin”
force group = “Multimedia”
force create mode = 0770
force directory mode = 0775
create mask = 0770
directory mask = 0775

Apply correct permissions to your share

This guide doesn’t go over this specifically, yet it is essentially listed in the section directly above.  Simply adjust the write list and valid users lists to reflect your share.  Without this, the permissions will effectively be reduced to the limitation of those in the share as everything has to pass through the share.  So set the share to read/write and ensure your users have access (preferably through a group).

Note a group is denoted be prefixing that @ symbol as in the example above.

Additional steps if Plex is not running on the same machine as your media

One of the challenges if you’re connecting to your storage from other systems is that you must match the names and ID’s of groups and users accounts across those systems.  This can be quite a challenge when default user accounts and groups are created without matching ID’s.  Thankfully, linux has been around a long time and has the capability to change the group ID (gid) and the user id (uid).

Create matching multimedia group on your Plex server

On the storage / NAS computer, use the group number you set above (2000), or find the allocated group id number for ‘multimedia’.  Note this number.

$ cat /etc/group

multimedia:x:2000:admin,plex,yourusername

On the Plex server, create the matching group with a matching gid

$ sudo addgroup -g 2000 multimedia

Create missing plex account and add to multimedia group on the storage computer / NAS

If you’re not running plex on your storage machine or NAS, the storage / NAS won’t have a plex account by default.

On the other machine (the one running your Plex server), log in and find the plex user ID.

$ sudo id plex (in the response, note the uid number)

uid=118(plex) gid=100(everyone) groups=100(everyone)

On the media storage / NAS machine:

$ sudo useradd -G multimedia -u 118 plex (replace 118 with the number you found from the command ‘id’ above.

$ sudo usermod -a -G multimedia plex

Final Word

After stepping through all of this, you ‘should’ have a working set of permissions.  It’s a little bit tricky to get your head around it at first, however with a bit of patience you should get there with success.

If you have any issues or questions, hit me up in the comment section below, or in the forums.

Marshalleq
New Host

0

Hi all, some of you may have noticed a small amount of downtime today as we migrated to a new host.  As a result you should notice quite a lot snappier performance.

If you experience any weird site issues, please clear your browser cache and try again, otherwise please let me know in the comments section.

We will continue to optimise the site in the coming days, however already the new host has shaved a whole 3 seconds off the home page load time.

Happy browsing!

How to install Logitech Media Server on Ubuntu Linux

Problem / Outcome Summary

  • This how to guide will enable you to install Logitech Media Server on Ubuntu Linux
  • For how to install Logitech Media Server on Sabayon Linux, click here

Why might I want to do this?

  • Because you still have good Logitech Media Server Hardware
  • Because QNAP have now announced they will no longer support Logitech Media Server / Squeezebox on QNAP devices
  • Because you have a large lossless library that runs better with a full blown Linux implementation than a NAS one

Foreword

To be clear, what is Logitech Media Server?

Logitech Media Server (formerly known as Squeezebox Server) is the software portion of about the only affordable network oriented media solution that exists, even today in 2016.  The Squeezebox lineup boasts an astounding collection of hardware and software that is awesome even today which included many impressive features such as true multi-room audio, 24 bit support for about every digital format known today and even now has third party hardware and software options that you can easily build yourself.

However, in an unfathomable move, in August 2012 Logitech saw it in their wisdom to end the line of hardware which had gained such a passionate, capable community AND decided not to listen to that community (see the comments) as well, instead diverting this unwanted attention to their commitment of support.  While they have made good on that promise, the failure of their new replacement product line has been embarrassing.  This of course has been much to the excitement of their competitors wallets, one of whom today is achieved nearly $US 1 Billion dollars in revenue for 2015,  from the very same market Logitech exited.  The whole charade has of course upset a lot of people who had invested in the line (like me).  Fortunately, there has been so much hardware sold to distributors and such that this product is still relevant today, indeed the hardware can still be purchased easily.

The good news is that the software portion is still current across Mac, Linux and Windows because of Logitech’s strong commitment to open source (the latest version at time of writing is created January 2016).  Who knows, perhaps Logitech will finally listen to the undying wishes of the community such as in this golden post written in 2015 here and revive the product line officially.  I mean what better way of stealing the market than reviving an existing line of astounding hardware that STILL has such a passionate community screaming for revival in a market segment that has such magnificent staying power.  Alternatively with the software being open source, it’s a golden opportunity for a competitor to come along and make a compatible product, gaining a loyal fan base in the process overnight.

As an example of the extent of how current the software still is, in 2016 I purchased a Spotify family plan and was easily able to switch on Spotify support which integrates right through the Logitech Media Server Ecosystem with only a few clicks.  Furthermore, thanks to the software being open source and the advent of the $49 Raspberry Pi, you can even build your own audiophile quality Squeezebox receiver very easily.  If that is of interest, take a look at using for example the piCorePlayer and a HiFiBerry DAC.  These make for a remarkable solution when you add the squeezebox controller (which is a nice little WiFi remote with a colour screen) that let’s you control any receivers or players in the house.  Alternatively, there are also great squeezebox remotes available for Android and iPhone such as squeezer.

Hardware

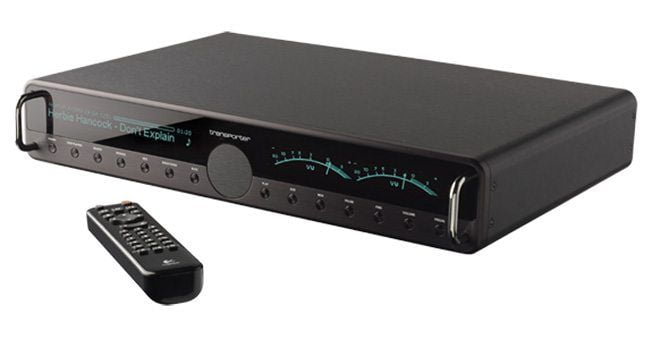
The Logitech Squeezebox line has some of the best hardware around.  It has an incredible lineup of devices covering many use cases such as bedroom, kitchen, lounge etc.  One of the most awesome pieces of hardware ever made (even against today’s standards – which was so good it was even modified professionally and resold to include even greater audiophile grade hardware) is the Logitech Transporter.  While the Transporter definitely tops out on the more expensive side of the line, the rest of their lineup is quite affordable when you compare it to the crazy prices of other networked media players such as the SONOS devices.  There are many reviews of the Logitech Transporter online, such as this one.

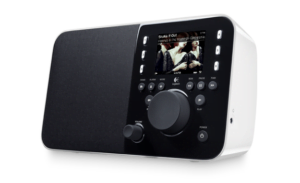
I couldn’t resist purchasing the Squeezebox Boom, mainly because it’s one of the few devices that has an automatically dimming LCD clock included.  The perfect alarm clock for your bedroom and mine still functions 100% 7 years later.  Even today, I still drool at the thought of owning a Transporter.

Why is the Squeezebox Lineup so great?

It basically comes down to hardware quality, price, features and a fanatical software community.  The software was made open source and as such features and firmware have continued even after Logitech decided to make the hardware end of life.  It sounds great, works great, supports about every operating system you can throw at it and also reads and plays about every audio format you can throw at it, including all the high definition lossless audio formats such as FLAC or Apple’s own codecs.  You can get hold of a Squeezebox Boom on ebay for about US $120 (sometimes less) which makes it at an extremely cheap solution considering the software is free.  It’s amazing that you can actually still buy this hardware, brand new and unopened.

Pre-Requisites

Software Dependencies

  • Ubuntu Linux
  • Logitech Media Server

Hardware Dependencies

  • Any Squeezebox hardware or Raspberry Pi installed with piCorePlayer
  • An internet modem / router / switch to connect your Logitech Media Server and Squeezebox Player together

Tools Required

  • SSH
  • A web browser such as Firefox, Chrome or Safari

Other Dependencies

  • A working internet connection for some of the features if desired

High Level Summary Steps

The below lists the high level summary of steps we’re about to take during this howto.

  • Download the latest Logitech Media Server from the official download site
  • Install Logitech Media Server on Ubuntu
  • Configure Logitech Media Server on Ubuntu
  • Scan and import your music into Logitech Media Server

Implementation

Download the latest Logitech Media Server from the official download site

There are two versions of Logitech Media Server that are considered ‘current’.  There’s the stable version which is 7.8.0 and the nightly version currently at version 7.9.0 and dated March 2017.

For the Stable version 7.8.0

Navigate to the official download section of the slim devices web site downloads.slimdevices.com then navigate to the latest Logitech Media Server version (currently 7.8.0).  In that folder either download the file ending in .deb or if on ssh right click by choosing copy link or similar.

Open a console or connect to your headless linux machine using ssh

$ ssh username@192.168.1.x

paste your link after the wget command

$ wget http://downloads.slimdevices.com/LogitechMediaServer_v7.8.0/logitechmediaserver_7.8.0_all.deb

For the nightly version 7.9.0

Navigate to the official download section of the slim devices web site downloads.slimdevices.com then navigate to the section entitled ‘nightly’.  Then go to 7.9.0 and either download the file ending in .deb or (if connecting through ssh) right click by choosing copy link or similar.

Open a console or connect to your headless linux machine using ssh

$ ssh username@192.168.1.x

paste your link after the wget command e.g

$ wget http://downloads.slimdevices.com/nightly/7.9/sc/10cf3e4/logitechmediaserver_7.9.0~1452060863_all.deb

Install Logitech Media Server on Ubuntu

sudo dpkg -i logitechmediaserver_7.8.0_all.deb (or 7.9 as appropriate)

Enter your password

Selecting previously unselected package logitechmediaserver.

(Reading database … 60289 files and directories currently installed.)

Preparing to unpack logitechmediaserver_7.8.0_all.deb …

Unpacking logitechmediaserver (7.8.0) …

Setting up logitechmediaserver (7.8.0) …

Adding system user `squeezeboxserver’ (UID 107) …

Adding new user `squeezeboxserver’ (UID 107) with group `nogroup’ …

Not creating home directory `/usr/share/squeezeboxserver’.

Making sure that Logitech Media Server is not running first: No process in pidfile ‘/var/run/logitechmediaserver.pid’ found running; none killed.

Starting Logitech Media Server.

Processing triggers for ureadahead (0.100.0-16) …

ureadahead will be reprofiled on next reboot

Logitech Media Server is now installed

You also need to install the LAME libraries:

sudo apt-get install lame

Configure Logitech Media Server on Ubuntu

Using your favourite Web Browser such as Mozilla Firefox or Internet Explorer, enter in the IP address of your Ubuntu server and the Logitech Media Server Port like this: http://192.168.1.x:9000

You will be presented with a sign in box for your mysqueezebox.com account (and the option to create one if you don’t have one already).  Enter in your account or create one as appropriate, then click Next at the bottom right.

You will then be prompted to select where your audio media is.  Select it by navigating to the folder using the + signs in the browser window until the folder you want is selected in grey.  Click Next again.

Click Finish on the bottom right.

Scan and import your music into Logitech Media Server

Navigate to your playlist folder (if you don’t have one just go back to where the music is stored and create one).  Click next when done.

You will then see your logitech Media Server Window, but it will have no music in it.  Click settings in the bottom right of the window.

You should have landed at the “Basic Settings’ tab.  Click the ‘Rescan’ button at the top right in the Media Folders line.  This will initiate the first scan of your media.  You can click the ‘Scanning – View Progress’ link at the bottom to check the progress of your scan.

Note under the ‘advanced’ tab, you can click on the drop down list on the left and choose rescan music library.  This has the options for when Logitech Media Server will rescan the library to check for new music.

Some of the settings I like to set are:

Player tab, (YourPlayerName)

  • Audio:
    • Pause at Power off / Resume at Power on
    • LAME Quality Level, 0 Highest Quality, very slow
  • Display:
    • Minimal Brightness 2
  • Last FM Scrobbler account settings

I personally also had to change two things to get it to play Apple Lossless.  Firstly I had to install faad

$ sudo apt-get install faad

Then in the Advanced, File Type area of the settings application, scroll down until you see the Apple Lossless section and change the FLAC setting to disabled.  That essentially turns off the internally compiled decoder and uses the system one you just installed.  I was using the latest 7.9 version of Logitech Media Server, so this may in fact be fixed by the time you read this.

That’s it.  Have a look around the other tabs, you might be surprised what this software is capable of.

Final Word

Logitech Media Server coupled with a squeezebox device is a powerful audio solution, even though you’d think it might have long disappeared.  The allure of one of those new Logitech Squeezebox Transporters certainly continues for me today.

If you’re interested in setting this up as a nice multi-room system, there’s a nice article over at brianlawes.com.

Marshalleq

How to screenshot on Mac OS X

0

Problem / Outcome Summary

  • How to screenshot on Mac OS X (Whole screen)
  • How to screenshot on Mac OS X  (Section of the screen)
  • How to screenshot on Mac OS X (Single window)
  • Explain where a screenshot goes on Mac OS X?
  • Please see the ‘Summary Overview’ tab below for a high level view of the objectives this ‘how to’ will achieve.

Why might I want to do this?

  • Because you want to send someone a picture of what you see on your screen for technical support
  • Because you want to send a picture of your screen somewhere else such as social media

Foreword

Be careful

When taking a screenshot, always be careful to read everything on the screen before and after.  There are plenty of embarrassing examples where people have accidentally uploaded information to the internet that had accidental information in the background.  Remember, once something is on the internet, it can never truly be deleted.

Pre-requisites

Skill Level – Basic
This ‘howto’ article is super easy!

Software Dependencies

Mac OS X

Tools Required

None

Hardware Dependencies

The computer your copy of Mac OS X runs on only

Other Dependencies

None

Summary Overview

High Level Summary Steps

The below lists the high level summary of steps we’re about to take during this howto.

  • Explain three different types of screenshots in Mac OS X
  • Explain where these screenshots are saved and how to find them

Implementation

How to screenshot on Mac OS X

Type 1:  Full Screen Screenshot on Mac OS X
  • Hold down Command and Shift, then press the ‘3’ key
  • You will hear a sound like a picture being taken
  • Open Finder (the Square smiley face at the bottom left of your computer)
  • Navigate and click on the item on the left called ‘Desktop’
  • The screenshot will probably be at the top and will be named ‘Screen Shot (date and time)
  • If it’s not there, try clicking on the ‘Date Modified’ column heading to order by date, it should then show up
Type 2: Selection Screenshot on Mac OS X
  • Hold down Command and Shift, then press the ‘4’ key
  • Your mouse icon will change to a cross hair icon (click esc if you want to cancel)
  • Move the mouse to where you want to being selecting the area to take a screen shot from
  • Click the mouse button and drag the mouse until the area you wish to screenshot is selected
  • Let go of the mouse button
  • You will hear a sound like a picture being taken
  • Open Finder (the Square smiley face at the bottom left of your computer)
  • Navigate and click on the item on the left called ‘Desktop’
  • The screenshot will probably be at the top and will be named ‘Screen Shot (date and time)
  • If it’s not there, try clicking on the ‘Date Modified’ column heading to order by date, it should then show up
Type 3: Single Window Screenshot on Mac OS X
  • Hold down Command and Shift, then press the ‘4’ key
  • Your mouse icon will change to a cross hair icon
  • Press the space bar, the cross hair icon now changes to a camera icon
  • Move the mouse over the window that you wish to take a screenshot of
  • Click the mouse button (or press esc to cancel)
  • You will hear a sound like a picture being taken
  • Open Finder (the Square smiley face at the bottom left of your computer)
  • Navigate and click on the item on the left called ‘Desktop’
  • The screenshot will probably be at the top and will be named ‘Screen Shot (date and time)
  • If it’s not there, try clicking on the ‘Date Modified’ column heading to order by date, it should then show up
Other Notes

To save the screenshot to the clipboard memory (instead of a file) for pasting into a document or similar, simply hold down the control key as well as the Command and shift keys.

Final Word

Taking a screenshot on Mac OS X is remarkably simple and yet extremely powerful when you know how.  If you have any questions, please leave a comment below or in our Tech-KnowHow forums.

Marshalleq

How to build Plex Media Server on Windows

Problem / Outcome Summary

  • This howto will enable you to build the Plex Media Server on Windows.
  • For how to build Plex Media Server on Ubuntu, please see building Plex Media Server on Ubuntu Server Headless
  • Please see the ‘Summary Overview’ tab below for a high level view of the objectives this ‘howto’ will achieve.

Why might I want to do this?

  • Because you know Windows and want to run your Plex Server on Windows rather than Linux, Linux Headless, Mac or a NAS.
  • To move Plex away from your NAS which may not have enough CPU to cope with demand
  • Because Plex is on a machine that’s get’s disconnected from the network and you want to change to a permanently connected system

Foreword

To be clear, what is Plex?

Plex is a fantastic media centre based on the software now known as Kodi, and formerly known as XBMC. The main difference between the two, is that Plex runs a true client / server setup, which has a number of advantages, including a true multi user, multi client setup that doesn’t require extensive skill or additional hacks to get it to work. Plex runs both a free and a subscription model, with the most significant differences being the subscription model (Plex Pass) gets bug fixes and updates quicker and more recently quite a few noteable enhanced features. The most noteable of those features in my opinion is the inclusion of a Spotify like music organisation and listening experience and integration with GraceNote, but also the ability to run a cheap Raspberry Pi 2 as a Media Player.

At some point in your Plex journey, you may find yourself listening to your music at work, or watching home video’s on multiple computers. When this happens, you’re likely to need an always on system, a more powerful system or perhaps getting a bit more power out of your existing system by re-purposing it with Linux.  Most people following this guide will likely only have a Windows Desktop version due to the cost of the Windows Server licence.  While you can run Plex Server on a Windows Desktop and a Mac Desktop, it is best for this machine to be always on and dedicated to the task.  For that we strongly recommend a Linux Headless server for reasons of price and performance.  This is however much harder to achieve.  If you wish to try running your media centre on Ubuntu Linux, please see our how to guide here.

Plex can be quite CPU intensive, it is preferable to have an i7 CPU or similar.

When does Plex Media Server use the most CPU?

Basically it comes down to this:

  1. Plex runs in two modes for video, one mode is a direct non CPU intensive playback mode (i.e. no transcoding) which comprises of:
    1. Playback devices that have Plex installed and appropriate codecs attached
    2. Devices that are non-plex but have appropriate codecs attached
  2. The other mode is a ‘Transcode’ mode which comprises of:
    1. Devices that do not understand all video formats such as Apple TV and require transcoding
    2. Devices that are constrained by bandwidth (such as when you connect to your home setup over the internet) and also therefore require transcoding

Simply put, the transcoding feature of Plex uses the CPU to re-encode your video or music into a format supported by the device you’re playing it on, or to an appropriate quality level to match the available bandwidth you have.  By default it does this in real time which is why a powerful CPU is recommended, however a new feature is available for Plex Pass customers that allows you to ‘pre-encode’ video into a suitable format, on your Plex Server before you need it.

Pre-Requisites

Software Dependencies

Hardware Dependencies

  • The hardware / computer your copy of windows runs on
  • A powerful CPU if possible
  • An internet Modem / Router / Switch to conenct your Plex Media Server and client through

Tools Required

  • A recent web browser

Other Dependencies

  • A working internet connection

High Level Summary Steps

The below lists the high level summary of steps we’re about to take during this howto.

  • Install Windows on your desired hardware (currently out of scope of this article)
  • Install the latest Plex Media Server onto Windows
  • Configure Plex Media Server
  • Other

Implementation

Download the latest Plex Media Server from plex.tv

Using your Favourite Web Browser such as Mozilla Firefox or Internet Explorer, Go to https://plex.tv/downloads, click on the ‘computer’ icon and then the ‘Windows’ icon. On that screen you’ll see there is a Download English button.  Click this and take note of where you have saved the file.

Also, don’t forget to do this under the Plex Pass menu (if you have one) rather than the Public Downloads menu.

Install Plex

  • Double click the Plex-Media-Server-0.9.x-en-US file
  • If prompted, click the ‘Run’ button on the ‘Open File – Security Warning’ diaglogue box
  • You should now be prompted with the Plex Media Server Welcome dialog box, if not it may be hiding behind another window, press Alt-Tab or minimise the window in front if you think this is the case
  • Click the ‘Install’ button (note you need to either be an administrator or know how to run as an administrator for this to work.
  • Click Yes on the User Account Control Box that pops up asking kif you want to allow this app to make changes to your PC
  • Plex Media Server now installs which will take a few minutes to complete.
  • Once finished click the ‘Launch’ button.
  • Log in to your account at plex.tv using the sign in button or the sign up button at the top right of the screen if you don’t already have one.

Note: if you have more than one server a unique port number can be assigned in the Windows Registry

    • Open Regedit
    • Navigate to ComputerHKEY_CURRENT_USERSoftwarePlex, Inc.Plex Media Server
    • By right clicking in the Plex Media Server registry Key, choose
    • New String Value, Add the following, Name: ManualPortMappingMode, Data: 1
    • New String Value, Name: ManualPortMappingPort, Data: 32401
    • Ensure your firewall has the appropriate port mapped
    • Make sure you restart your Windows Desktop / Server for the changes to take effect

You will then be prompted for your password etc

You will likely be presented with a Plex Terms of Service window.  Please read these and click Agree assuming you wish to continue.

Configure Plex – Ensure your media is available.

You need to ensure you have the music, home video’s etc in a location Plex Server can see them, this could be on a disk attached directly to your Windows box, or on a network device. In my case, I use a NAS.

On a NAS, because it runs linux, it’s generally better to use NFS, because NFS uses a lot less CPU to run and is quite simple to set up, however SMB / CIFS currently works better on QNAP NAS (which I have) due to a bug, it is also easier to connect Windows to SMB / CIFS because SMB/ CIFS is the Windows native protocol.  However if you wish to connect NFS to your Windows machine have a look at the official information for doing this with the NFS client here.

If you have a NAS, you will already know how to map network drives.  Map the appropriate, Video, Pictures or Audio network drives to a letter of your choosing and ensure you have the option to reconnect at sign-in selected.  Note the Drive letters you chose and what they are for.

Also, ensure your permissions on the NAS are set correctly. This is out of scope of this article since it get’s quite complicated, however the command chmod is what you’re after, if you’re not using your NAS GUI.

Configure Plex to see the new library in the new Windows Drive Letter Mappings you just created

Edit your Library settings

You may, or may not be presented with the ‘Get Started’ screen.  I’ve personally found this to be slightly hit and miss.  If you do:

Enter a friendly name for your Server in the Friendly name box: My Server Name

You can choose the ‘Connect to Plex’ option if you like, just be aware this shares parts of your library with plex.tv

Click Next.  You will now be asked to ‘Organise your media’.  Make sure you choose add library.

If you don’t get presented with the option to ‘Get Started’, then just login to your plex installation through your web browser

In your web browser, go to e.g http://your server’s IP address:32400/web/index.html (or 32401 if you chose it)

Hover over the ‘Add Library’ option with the + sign next to it.

Click the appropriate icon for the media type you are trying to add, e.g. Photos

You can choose a different name or accept the default name of Photos. Click Next.

Click ‘Browse for Media Folder’ and select the drive letter and path you just added appropriate for the media type you are adding.  Choose Add.

Choose Add Library

Plex will now scan your media, which is the last step in making it available to your Plex Media Player clients such as Plex Media Player on Raspberry Pi 2.

Install Channels

If you were presented with the Get Started screen, you will see the Install Channels option.  If not, simply click the channels section on the left hand side of you main plex screen, then choose ‘Install Channels’.

Channels enable you to see other media, available on the web, but through the Plex interface, rather than the native one.  This makes it nice and easy to get this content on all your devices, even those that may not normally be able to receive this content.  For example Apple Movie Trailers can be watched on an Android device.

Click the Channel you wish to install, then click Install.  Once completed, click Next and Done, or just close the channel window if you did not get presented with the Get Started Screen.

If you were following the get started screen, be sure to check out the additional channels (there are lots) through the Channels menu in the main menu of the Plex home screen.

Other

I have just noted this (unofficial) code to get Plex to start as a background service in Windows.  Please let me know if you’d like this included in the guide, or a binary made available for download.

Final Word

Plex is a powerful media center, but it’s also a powerful media server. In this configuration, it’s a true server that holds it’s own like no other product can.

For guides on how to set up some of the clients, take a look at one of the following Plex Media Player articles:

How to set up Plex Media Player on Rasperry Pi 2

How to set up Plex Media Player on Apple TV 2 or 3 with Plex Connect.

Marshalleq

How to Install Official Plex Media Player on Raspberry Pi 2 / Pi 3

Problem / Outcome Summary

  • This ‘How To’ article will show you step by step how to set up and install the official Plex Media Player on a Raspberry Pi 2.
  • Please see the ‘Summary Overview’ tab below for a high level view of the objectives this ‘How To’ will achieve.

Why might I want to do this?

  • Because the Raspberry Pi 2 is about the cheapest media centre hardware available today
  • Because the Raspberry Pi 2 is small and compact and uses very little power
  • It’s extremely simple to install
  • There is no overhead of another full operating system such as Windows or Mac
  • Because it works with your standard TV remote out of the box!

Foreword

To be clear, what is a Raspberry Pi 2 and why would I want to put Plex Media Player on it?

Simply put, the Raspbery Pi 2 is a miniature computer designed to be very cheap (approximately $25) but which is capable of running a full Linux operating system (and more recently a special version of Windows).  It has great graphics capabilities.  More information on the Raspberry Pi 2 can be found here.

Pre-Requisites

Software Dependencies

Hardware Dependencies

  • A Raspberry Pi 2 / 3
  • Micro SD Card (Preferably Class 10)
  • A good quality micro USB power supply
  • An HDMI cable
  • A micro SD card reader OR an adapter to a standard SD card for your computers SD card slot reader

Tools Required

  • Windows, Mac OS or Linux to put the Plex software onto the Raspberry Pi 2’s SD Card

Other Dependencies

  • A working ethernet network (wireless currently not supported)

Summary Steps

High Level Summary Steps

The below lists the high level summary of steps we’re about to take during this howto.

  • Download the Official Plex for Raspberry Pi 2 image
  • Install the Plex Raspberry Pi image onto the micro SD card
  • Configure Plex on the Raspberry Pi 2
  • Tweak the settings

Implementation

Step 1: Download the Official Plex for Raspberry Pi 2 image

At date of writing, you need a Plex Pass to download this software.  This usually changes some time after the software is no longer in a preview stage.

  • Ensure you have a Plex Pass
  • Download your Plex for Raspberry Pi 2 by Navigating to www.plex.tv in your web browser
  • Then click:
    • The Plex Pass Downloads button
    • The Plex Media Player download button
    • The ‘Embedded’ tab
  • Save this file somewhere on your computer and remember where you put it (it will be called something like PlexMediaPlayer-1.0.3.140-16fa0ecc.RPi2.arm.img.gz
  • Extract the img file
    • Mac / Linux: gunzip PlexMediaPlayer-1.0.3x
    • Windows (try using unrar)
  • You will now have a file called something like PlexMediaPlayer-1.03x.img

Step 2: Install the Plex Raspberry Pi image onto your micro SD card

  • Mac – Follow our guide on how to copy an image from an img file onto a micro SD card here
  • Linux – dd if=/yourimagefile.img of=/dev/sdx
  • Windows – Use Image writer here
  • Once complete, put the Micro SD card into the Raspberry Pi 2 and switch it on (make sure it has a keyboard, mouse, HDMI and network cable plugged in first)

Step 3: Configure Plex on the Raspberry Pi 2

The first thing that should happen is you should see some linux commands come up on the screen.  These commands are resizing the image you just extacted to your Micro SD card, so that it fits on the card properly, then it will reboot.

You will then be presented with the Plex Media Player Preview screen

Next you’ll get the familiar request to log into the plex.tv/link page in order to connect your Plex Media Player to your Plex Media Server.

  • Navigate to www.plex.tv/link on a separate computer’s web browser
  • Enter the code you see on the Plex for Raspberry Pi 2 screen into the link screen in your web browser
  • Press the link button
  • You should now see your Plex on Raspberry Pi 2 come to life and you can start using it!

Step 4: Tweak the settings

Essentially you’re now all done, but there are some optional tweaks I recommend

  • From the account menu on the top right of the Raspberry Pi 2, select the Settings option, then choose:
    • Video, Local Quality 8Mbps, 1080p – This can take some load off the Raspberry Pi for large files)
    • Video, Sync Mode, Display (resample Audio) – This makes the video’s play really smooth in most cases, although sometimes there is a few seconds of jitter at the beginning, but it’s totally worth it.
    • Audio, Device Type (Can be set to Basic, Optical or HDMI).  Note there is an advanced settings area to give you control over Dolby Digital AC3 and DTS.  Also Channels can be set to 5.1 or 7.1.  There is even an option to use an external DAC (Digital Audio Converter) if you have one via USB.

Bugs / Things to be fixed

  • If you choose sign out from the top right of the screen, it actually disconnects you from the server requiring you to enter the pin again.  In my opinion this should be renamed something else.  To sign out like it says, just keep pressing escape where you’ll have four options, “Relaunch, Power Off, Reboot and Cancel”
  • On this build version I could not get the headphone socket to work, HDMI works well though
  • On this build version, the aspect ratio does not correctly get set resulting in a very stretched full screen for some content.

**Update** As at February 2nd a new version is out.  Initial testing seems to indicate the most painful issue is resolved (aspect ratio).  This will now replace my playstation 3 Plex media player as it is faster, smoother, more responsive and a whole lot less hassle than that platform currently is.  Who knew a tiny little ARM processor would work better than the grunt behind the PlayStation.  According to the developers, the relationship with Sony is not as great as it could be and as such they have less capability than the likes of Netflix do, when it comes to optimising code to play nice.  Kudos to the Plex crew for making the Raspberry Pi 2 such a pleasure to use.[/vc_column_text][/vc_tta_section][vc_tta_section title=”Final Word” tab_id=”1483657035357-36e2d8d1-b325e50c-cffed7bf-c752″][vc_custom_heading text=”Final Word”]

Html code here! Replace this with any non empty text and that's it.

This little unit performs remarkably well and is surprisingly easy to set up provided you can get your head around making an image in step 2.  I suspect we’ll find the guys at Plex will create a special installer for it at some point.  Of course, you also need to have installed Plex Media Server on Windows, Linux, Mac,  a NAS or similar for this to work at all.

The performance is much, much better than the RasPlex I have tried, possibly because it’s based on the amazing OpenElec, a really great little embedded distribution.

And of course, I just love these media centre’s that make use of HDMI-CEC. – (that’s the technology that makes your TV remote control the Media Centre through the HDMI cable).  It makes things super easy and awesome to control.

Official Plex on Raspberry Pi 2 is definitely a solution worthy of keeping under your television set.

Enjoy

Marshalleq

How to install CrashPlan on Ubuntu Linux Desktop

3

Problem / Outcome Summary

  • This article will show you how to install CrashPlan on Ubuntu Linux Desktop
    • (To learn how to set up CrashPlan on Ubuntu Linux Headless (No GUI) click here)
  • Please see the ‘Summary Overview’ tab below for a high level view of the objectives this ‘howto’ will achieve.

Why might I want to do this?

  • To backup a single Ubuntu Linux Desktop System
  • To backup data connected to an Ubuntu Linux Desktop System
  • To create a backup ‘target’ for other computers on your network to backup to
  • To Backup to another CrashPlan backup Target
  • To help speed up a restore from a slow Windows or Mac CrashPlan client

Foreword

To be clear, what does CrashPlan do?

Simply put, CrashPlan gives you good automatic options for backing up your data. These can be at a cost, or at no cost depending on which situation suits you best.

What are the current backup features of CrashPlan?

CrashPlan works on Windows, Mac OSX and Linux. It also has unofficial ‘headless‘ ports for a number of NAS devices including QNAP, Synology and Netgear’s ReadyNAS.

Other noteable features of CrashPlan include a truly unlimited backup for a very low cost and that it retains any and all deleted versions of your files forever.

Something particularly noteable in this day and age is CrashPlan’s ability to support client side encryption. Client side encryption means that CrashPlan has an extra level of security than most online backup systems do today.

With client side encryption, Code42 (the CrashPlan company) do not hold your decryption key themselves, you do (if you lose this key, your backup is useless and you’d have to start again). This makes it nearly impossible for your data to end up being used for purposes other than it was intended. I say ‘nearly’, because there’s always a chance with technology, however with this feature the data is almost definitely safer from e.g. identity theft than it will be on your own hard drive at home.

For me, client side encryption is a mandatory requirement – I do not put personal data on the internet such as e.g. Inland Revenue Department numbers, banking numbers etc. Whether you realise it or not, these will likely be on your hard drive somewhere, which means you’re probably backing them up to the internet.

A full list of features for CrashPlan can be found here.

Plans

There are three tier’s of Plans available with CrashPlan. CrashPlan Home, CrashPlan Business and CrashPlan Enterprise.

CrashPlan Home Options:
  • Free: Backup to local assets such as hard drives and computers owned by you
  • Free: Backup to remote assets such as friends computers, or computers you own that are connected to the internet
  • Not Free: Individual / Family Plans listed here
CrashPlan Business / CrashPlan Enterprise

Some free options do exist in the Business / Enterprise plans too, specifically a peer to peer option in the enterprise product.

Remember, for a full comparison of all the options, see the CrashPlan comparison here.

Please note: Storing your personal information on the internet is highly risky. Globally, the new generation of internet users have become used to social sharing with little consequence and the impacts of this are still being worked out through legal and moral systems. If you store any data that could be considered sensitive to you, or misinterpreted by others, it is strongly recommended to use a client side encryption key.

Do you REALLY want to pay someone else to backup your data?

As you have seen above, there ARE free options available, within the CrashPlan application. It is rare to get such a full featured and reliable application as CrashPlan, available with free options and one that is indeed very simple to use.

Tip for OSX customers: Mac OSX customers in particular should note, that backup options included with the shipping version of OSX are limited to Apples Time Machine backup only. Strictly speaking, Time machine is designed only to do a full system backup. For this reason, CrashPlan offers a high quality and free alternative that allows you to select a smaller subset of backup files (such as your documents folder) and enables you to back it up elsewhere on your network according to the free options above.

The three most likely scenarios requiring recovery of your data are:

  1. Accidental deletion of a file or folder
  2. Loss of data due to theft or fire
  3. Hard Drive Crash

All of these scenarios are covered by CrashPlan free, provided that that scenario 2 is hosted in a remote location that would not be affected by fire or theft. It would therefore be relatively easy to make a mutually beneficial deal with a friend to use each others spare hard drive space (or buy each other a hard drive to use) so that you have off site backups. This would actually get you 99% safety. The other 1% is in the unusual but possible case that your friends computer hard drive dies and e.g. your computer is stolen at the same time. Not common, but not unheard of. To mitigate this scenario, you could of course add a third friend to backup to.

So if I can backup for free, why would I pay to backup to the CrashPlan cloud?

There are a few reasons for this:

CrashPlan only costs you $5 per month for what is essentially an almost guaranteed recovery. However there are some other items that are also worth noting.

  1. Restoration speed – Internet connections in countries like New Zealand and Australia, do not commonly have fast upload speeds. If you want to restore your data, it will be slower than using CrashPlan due to the upload speed of internet connection where your backup is stored (i.e. at your friends house).
  2. Enterprise data security – CrashPlan utilise data centers that maintain your data in monitored conditions to protect against various threats such as overheating and security hacks.
  3. Availability – Your friend may shut their computer off when you turn yours on. This may result in backups not being completed ever, especially considering how long it can take with the poor upload speed some customers have and the quantity/size of backup data many of us now have on our computers.
  4. Unlimited backups – Your friends hard drive space is eventually going to run out, (and so is yours if they are backing up to your computer too. CrashPlan really does offer a truly unlimited backup.

What is the performance like?

The performance will entirely depend on your scenario. Certain types of files can be compressed which means that they will upload faster. If you’re uploading to a friends house, they may have a slow connection, or you may have a slow upload capability. ADSL customers in NZ and Australia will only have a 1Mb/s upload speed which would take months to upload a fairly typical 1TB of disk space. VDSL or fibre customers on the other hand may take weeks or even days for the same data. One option in CrashPlan that does make a difference is the de-duplication option in the advanced settings. Set this to minimum for more speed (especially if you run client side encryption), although if you have a lot of similar files and a slow connection, keeping it at maximum may also be faster – just try it out and see what works best for you.[/vc_column_text][/vc_tta_section][vc_tta_section title=”Pre-Requisites” tab_id=”1483656936239-1facad3b-9216e50c-cffe5dca-0f79″][vc_custom_heading text=”Pre-Requisites”]

Html code here! Replace this with any non empty text and that's it.

Software Dependencies

Hardware Dependencies

  • An internet modem / router capable of performing NAT

Tools Required

  • SSH Access
  • A recent web browser

Other Dependencies

  • A working internet connection

High Level Summary Steps

The below lists the high level summary of steps we’re about to take during this howto.

  • Download and extract the CrashPlan Application
  • Install and configure the CrashPlan Application

Implementation

Download and extract the CrashPlan Application

Using your Ubuntu Linux web browser, download the latest linux CrashPlan from: www.code42.com/crashplan/thankyou?os=linux

Open a console window and navigate to the directory you downloaded the ‘crashplan_4.x_Linux.tgz’ file to, using the cd command

It’s always a good idea to be up to date with Ubuntu binaries.

sudo apt-get update

sudo apt-get upgrade

Extract and install CrashPlan

tar -zxvf crashplan_4.x.tgz where x is your downloaded version

Install and configure the CrashPlan application

cd crashplan-install

./install

Welcome to the Code42 CrashPlan installer.

Press enter to continue with installation

At this point if you haven’t installed as a root user, the crashplan installer will ask you if you would like to. It is recommended to do so, so enter y and press Enter

Enter your sudo password <ENTER>

Press Enter again to read the EULA

Press Space Bar to scroll through the EULA until you reach 100%

Type ‘yes’ to accept the EULA

Accept the default parent directory of /usr/local

When prompted that this does not exist, /usr/local/crashplan, press Enter on the existing ‘y’ to proceed

Do the same, but be careful about the third option, incoming backup data. This is where CrashPlan will store any backups you set from another crashplan app. You may like to make this directory on a network drive, an external drive or something else.

Press enter through all the prompts until you get a summary of your selections. You will be asked if these are correct. Press Enter if they are.

CrashPlan now downloads the Java Runtime Environment (JRE) from the internet.

If you get an error at the end about /usr/local/crashplan/electron not being able to install, this is normal. It’s just an unpublished product from Code42 that hasn’t completed rollout to the home product yet. Everything will work out OK even with this error.

Press Enter to complete the installation

Note the Important directories (you may need them later down the track). The defaults are:

Installation – /usr/local/crashplan

Logs – /usr/local/crashplan/log

Default Archive Location – /usr/local/var/crashplan

Readme – /usr/local/crashplan/doc

Start Scripts

/usr/local/crashplan/bin/CrashPlanEngine start|stop

/usr/local/crashplan/bin/CrashPlanDesktop

You will then be prompted if you would like to start the CrashPlanDesktop app. Press enter on the y and you should see the standard CrashPlan window asking you to create a new account or to use an existing account.

The CrashPlan desktop app can be started via the desktop shortcut, or from within the Ubuntu Applications List.

That’s it!

Final Word

So there you have it, a fully functioning CrashPlan Desktop application for Ubuntu Linux.  It’s great for performing restores, because for some reason (likely to do with Java) the client is faster than the Mac client.  I believe it’s also faster than the Windows client but I have yet to confirm.

**Looking for creating a manual backup process? Why not read our article on how to create a manual backup process and why you need one, here.

Marshalleq